You've finally reached the Bio Lab, the air is thick with that sickly purple mist, and Peck is screaming in your ear about warheads. Honestly, the Terminus BO6 easter egg is a brutal test of patience. It’s not just about shooting zombies anymore; it’s about math, timing, and not getting slapped into oblivion by a giant sea monster. If you’re trying to solo this or carry a team that can’t find their own feet, you need a plan that actually works.
Most people fail because they wait too long. They think they need to be round 30 with every perk. Wrong. If you’re hitting the boss fight past round 20, you’ve basically already lost. The zombies scale. The boss doesn't, but the "adds" will absolutely swamp you. You want to be in and out by round 15 if you can swing it.
The Beamsmasher is Not Optional
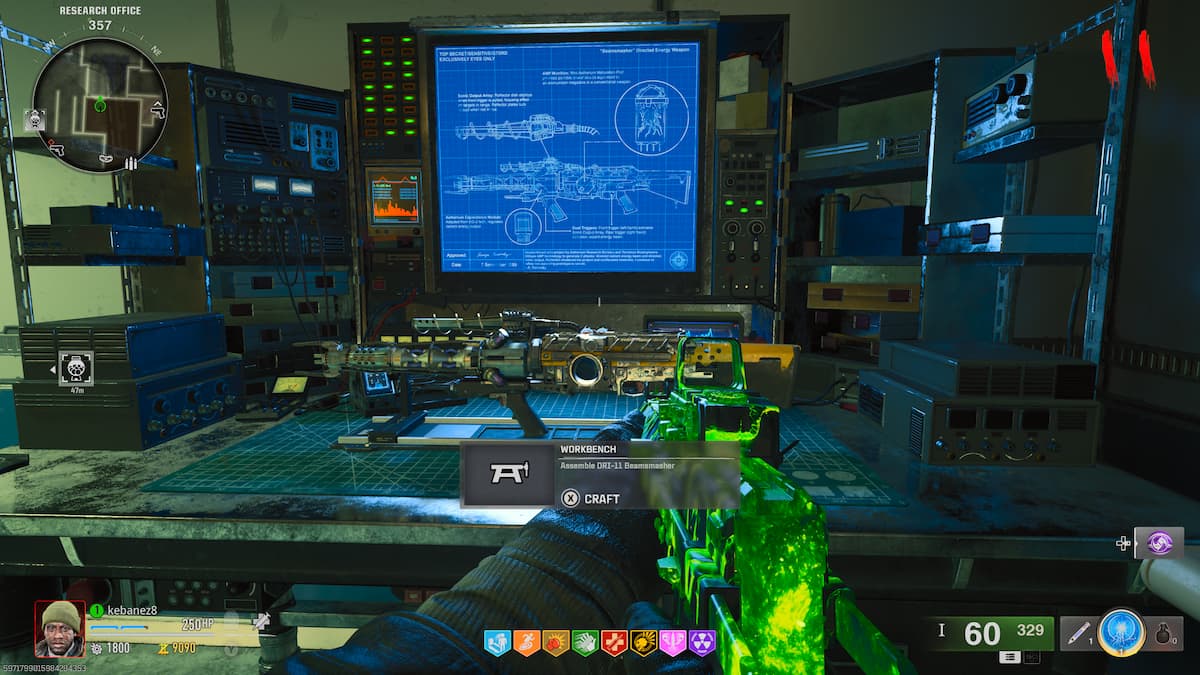
Don’t even think about starting the "real" quest until you have the DRI-11 Beamsmasher. It’s the map's Wonder Weapon, and it’s the only thing that makes the later steps bearable. You’ve got to do the laptop puzzle first. Basically, you find three laptops around the main island—usually near the docks, the Quick Revive area, and the Control Center.
Then comes the math. Yeah, Call of Duty makes you do algebra now. You’ll find a whiteboard in the Research Office with X, Y, and Z values. You have to match symbols to numbers on a grid. Pro tip: just take a picture with your phone. Don’t try to memorize it while a Mangler is trying to take your head off. Once you get those values, plug them into the equations on the second board to get your three-digit code.
Once you have the Beamsmasher, you need the hard drive. Look for a Tentacle Trap that’s specifically broken—it’ll have a keycard and some blood under it. Shoot the trap with the Beamsmasher’s secondary fire while it’s active, and it’ll drop the drive. Take that to Peck at the Guard Station. He’s a jerk, but he’s your ticket out.
Finding Nathan and the Three-Digit Code
This is where the story gets heavy. You’re looking for Maya’s brother, Nathan. He’s locked in a chamber in the Bio Lab, but the keypad is locked. You need three numbers hidden around the island. They change every single game, so don't bother looking up a "static" code.
- The Clock: Go to the Interrogation Room. Look through the bars at the clock on the wall. The hour hand (the short one!) is your first digit.
- The Playing Card: Head to the Mess Hall. There’s a bulletin board near the door. Check the card pinned there. An Ace is 1, and everything else is face value.
- The Safety Sign: In the Engineering Room, there’s a sign that says "Days Since Last Injury." That number is your final digit.
Punch those into the keypad by Nathan's window. If you're in co-op, everyone has to turn the valves at the same time. If you're solo, just interact with it. Be ready. Nathan has turned into an Amalgam, and he’s not happy to see you. Aim for the glowing weak spots on his heads. If you’ve got a Thompson or an ASG-89 Pack-a-Punched, he goes down pretty quick.
The "Point of No Return" and the Shipwreck
After Nathan is... well, dealt with... you’ve got to dive into the water in the Bio Lab. Grab the keycard from the bottom of the pool. This goes to the Communications room. Peck will tell you the system is bugged and sends you to the Shipwreck. Grab a boat. You’re looking for two Node Connectors inside the hull of the crashed ship.
Once you pick them up, the room locks down. It’s a tight space. Use a decoy or a monkey bomb if you have one. Once you’re out, you have to plug these nodes into slots around the map. One is usually under the Sea Tower, and another is near the Sea-Side Path or the Southern Island.
Hacking the Satellites
This is the part where most runs die. You get a hacking device from Peck. You have to boat out to three red buoys (satellites) in the water. Here’s the catch: once you start the first hack, you have a very short window to finish all three. If you’re too slow, the hack resets.
Watch out for the Parasites. They’ll swarm your boat and knock you into the water. And if you stay in the water too long? The sea monster—Patient 13—will eat you. Literally. It’s an instant kill. Stay on the boat, kill the flies, and move fast.
Defusing the Bombs
After the satellites, hurry back to the Bio Lab. You’ve got five minutes. Three warheads are armed and ready to level the island. They look like purple glowing coils in the walls. You have to stand there and interact with them to defuse.
- Bomb 1: Bottom floor of the Bio Lab.
- Bomb 2: Also bottom floor, but tucked away.
- Bomb 3: Under the raised office area.
If you’re solo, use an Aether Shroud or a Smoke Grenade. The zombies won’t stop coming, and you can’t shoot while defusing. If you have teammates, have them run "trains" (leading the zombies away) while one person focuses entirely on the bombs.
How to Kill Patient 13
The final boss is a massive, multi-phase nightmare. Before you interact with the big door at the bottom of the Bio Lab, make sure you are fully kitted. Triple Pack-a-Punch is highly recommended. Get your perks—Juggernog, Quick Revive, and Stamin-Up are mandatory.
Phase 1: The Shoulders
Patient 13 will emerge from the water. It has glowing red spots on its shoulders. Blast those. Use the crates for cover because its ranged attacks hit like a truck. If the arena starts filling with poison gas, look for the tentacles outside the railings and shoot them to clear the air.
Phase 2: The Mouth
Once the shoulders are gone, the boss retreats and comes back angrier. Now, the mouth is the weak spot. When it opens up to roar or charge an attack, dump everything you have into it. If you have a Chopper Gunner, now is the time to use it. It provides massive damage and keeps you safe from the ground hoard for a few seconds.
Phase 3: The Final Stand
The arena gets smaller. The boss starts using an EMP-style shockwave. When the screen glows blue, get behind a solid object or you're dead. The weak spots move to the eyes and the mouth. This is a DPS check. If you don't kill it fast, the Amalgams and Manglers spawning on the floor will eventually overwhelm you.
Quick Tips for Success
- Use Gobblegums: "Wall Power" or "Perkaholic" can save you thousands of Essence early on.
- Melee Macchiato: Don't sleep on this perk. The knockback is great for clearing space when you're trapped.
- Mega-Stuffy: There are six stuffed animals hidden around the map. Find them all to summon a toy dog that fights for you and can actually revive you for free.
To wrap this up, the Terminus BO6 easter egg isn't about being the best shot; it's about managing your resources. Keep your round count low, get that Beamsmasher early, and don't panic during the bomb defusal.
Next Steps
- Load into Terminus and focus entirely on the power generators and Pack-a-Punch by round 4.
- Start the laptop puzzle immediately to get the Beamsmasher components while the zombies are still weak.
- Save your salvage for armor upgrades—you’ll need Level 3 plates for the final boss fight.
.png)